build a landyacht wheel, the easy peesy way

> 10 years ago
Reply
Register to post, see what you've read, and subscribe to topics.
landyacht
landyacht
WA
5921 posts
WA, 5921 posts
18 May 2012 9:28pm
Ive started building a flat glass/ally wheel from my last lot of resin. this time I'll take lots of photos, just in case anybody misses something, and assume that you are all ignorant of pletty much everything thats in all the other posts.
please dont post replies until Ive finished, then go for it, or post questions on one of the other wheel topic threads.
I will make up one of my flat glass rims with a composite bearing housing and outer rim built from 2 25mm aluminium bike rims.
' you can use steel rims. basically its a wheel based on newzealand designed wheels with internal spokes adding AUS 230's bike rim idea , using vindisdads bearing housings. and my lazy flat mold idea .
all the resin im using is polyester, no epoxy, you can use epoxy or vinylester if you like . the filler powder used is called cotton flock.
my wheel will be to suit a 6004 bearing , you will have to machine athe neccessary nylon inserts, or polished/waxed wooden ones, or polished steel/ally ones as you see fit.
the diameter rim I'm building this time is a 16" rim as it is quick , and I have just enough resin, the same construction method applies to any size bike rim you would like to build.
I will take photos of the rim being prepared tommorrow so go to bed
landyacht
landyacht
WA
5921 posts
WA, 5921 posts
19 May 2012 9:09pm
building the mold
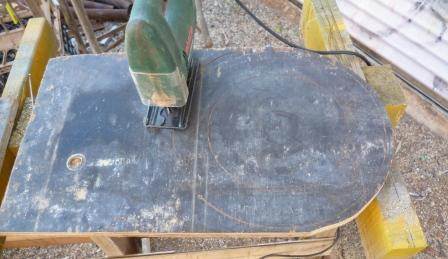
Im using a peice of concretors formply again, as it is waterproof and smooths out easily


here Ive marked out a 12"rim and a 16"rim by having the radius marked on a peice of ply, screwing a small screw into the wood and drawing the circle. when I cut out I make it about a cm wider to keep the edge flat.

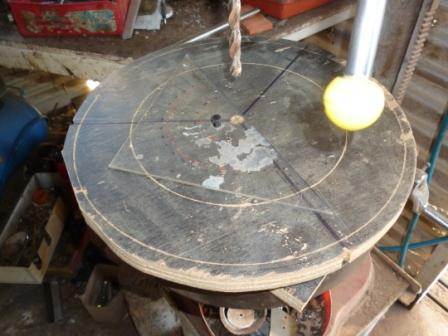
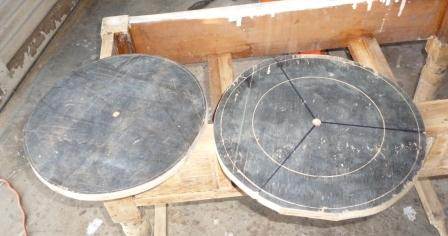
the screwhole is then used as the centre mark for the mold Ive drilled out to 10mm , simply because I have a pile of 10mm offcuts of threaded rod.I wouldnt go smaller, possibly 12mm would be an ideal size. Ive marked out the positions with a protractor and cut a groove in the edge to mark where the spokes will line up

for those unwilling to do the calculation
3spokes-120degrees
5 spokes-72 degrees
7 spokes-51.5 degrees
If you prefer another number of spokes you'll have to do your own sums.
I would use 3 spokes for a 16",5 for 20" 7 for a 26"

whilst youve got your wood and jigsaw out cut a second disk ,and drill it out with the same size drill. this will be used as a clamping plate to get rid of this little step


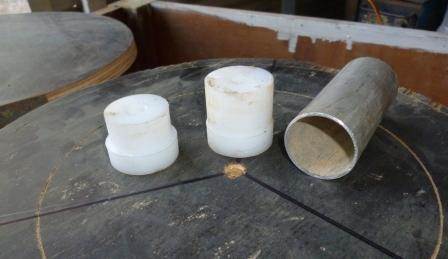
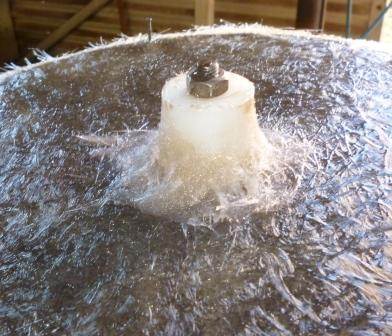
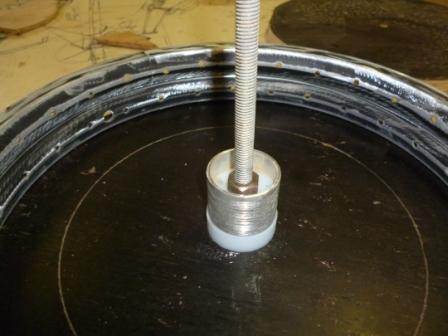
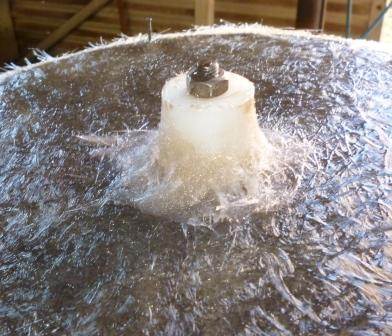
heres the 2 nylon molding plugs that Ive made up to give something to build up the bearing housings. the ally pipe sits on the left hand piece when it is being glassed into place. the middle one allows you to build up a glass housing that will fit over the ally when the final assembly takes place.
I wont go into any discussions on ally hubs/glass hubs. this is the system Im really happy with, this wheel will be number 12 and all the housings so far have been successful


when the first disk is being prepared for laying up ,the molding , the middle one is bolted down and series of small nails are hammered in around the scored ring .
when the rim is layed into place it should fit snug

heres the nails and also the grooge to show where the spoke will go.

the roundness can now be checked by simply running a tape around the rim. this one is within 1mm all round

the rim can now be taken out, but I will be putting it back on to make sure there is a good surface to glue to

landyacht
landyacht
WA
5921 posts
WA, 5921 posts
21 May 2012 8:30pm
before I start mixing resin, I will quickly go through how we prepare the rims, and look at some of the little traps we have discovered. Ive been working with aluminium rims , usually 25mm wide , 2 rims giving a 50mm rim , but you could do 2x32mm rims, or a single 38mm rim. ive done a 26" x32mm rim into a wheel ,and wasnt happy with the running, or the traction.
all the ally rims Ive come across have parralel outer faces. some of the steel rims Ive seen have a bevelled outer face, . perhaps vic could put up a photopost after this one to show how he prepares his steel rims.
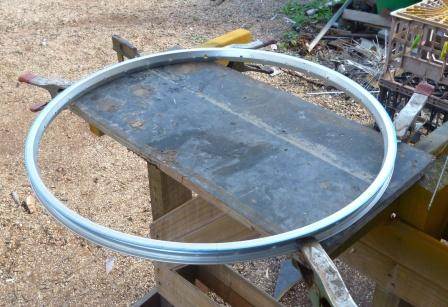
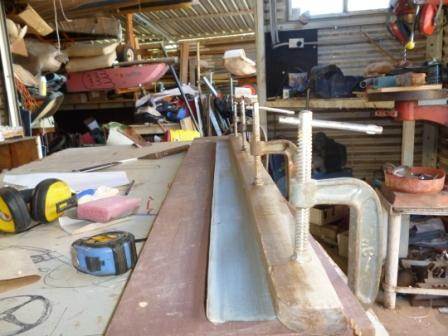
initially I was trimming the rims held vertically but we found that simply clamped to a sturdy work surface with the edge to be cut on top

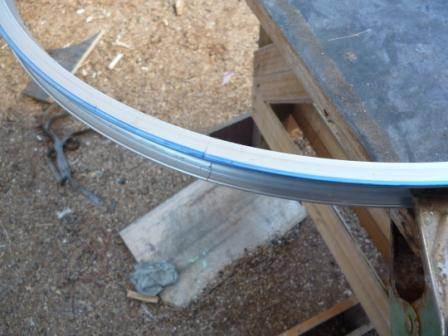
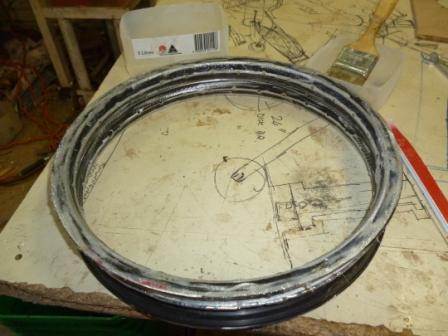
all i want to cut off is the thin bead on the edge of the rim, leaving an edge to tig weld. I found that running a texta line around the edge give a great guide. thus the blue line. also note that these rims are usually joined by 2 steel pins ,rather than a weld so make sure the 2 rims you weld together have the join on opposite sides of the wheel
one of my rims ended up with both pinned joins next to each other and needed alot of lead to balance it

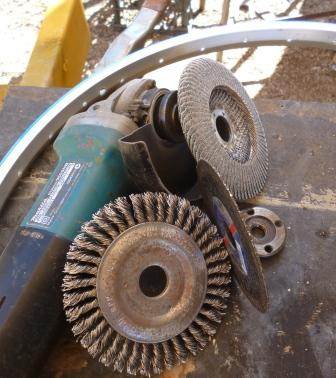
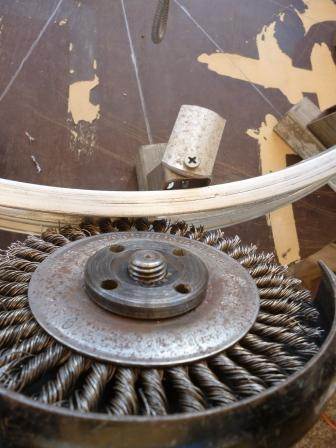
these are the 3 disc types Im using, a coarse,40grit,flap disc,a ultra thin cutting disc,1mm,and a stainless steel wire wheel. brass would be fine, but not steel as this can contaminate the ally and stuff the weld.

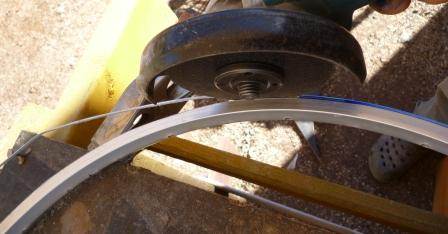
the trick when cutting is to steadily let the disc do the work cutting just inside the thicker lip and dont let the disc go too far in . the lip should just peel of in a longstrip


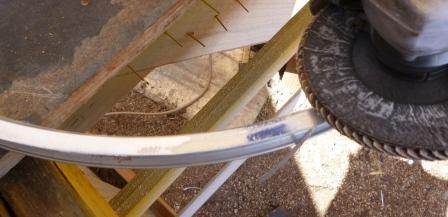
now its time to really clean the cut side of the rim off. the outer edge is simply cleaned with a flap disc. what you are trying to achieve is to remove the anodizing and get back to bare ally

next the tricky bit , for the inside of the rim you need to use the SS wire brush,making sure any peices of the old rim bead are brushed off, its important to make sure any anodising and old rubber is removed before welding.

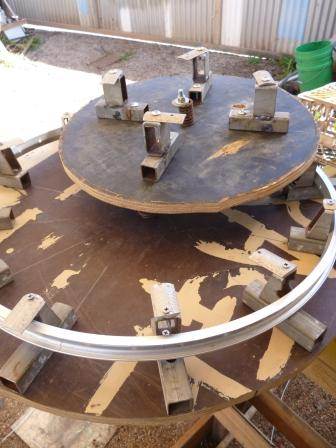
for the welding a jig has been made on a rotating board with raised clamps. when we originally did this it was hard onto the wood and the jig started to smolder, so we set it up lifted off the wood.
the 16/20" frame has 4 stations, clamped with 1/4" bolts, the 26" frame has 12 stations , all screwed, but they are getting sloppy after 9 rim welds and the jig will be converted to bolts shortly

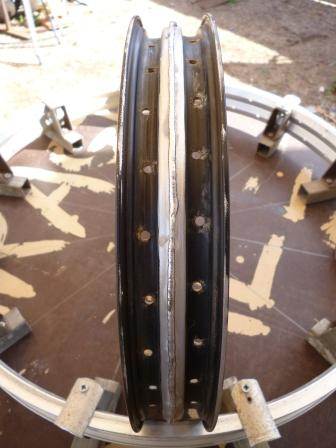
well here's one I prepared earlier. the tig weld is done with arc only, no rods. if bits of the rim bead remain they show up as a slump in the weld where more molten ally occured.
this will be lightly sanded before the protective tape goes over to protect the tube

that it for tonight , Im stuffed, maybe vic could show how he does a steel rim
landyacht
landyacht
WA
5921 posts
WA, 5921 posts
28 May 2012 9:27pm
sorry about the lazy week, I did all the next stage a week ago but got kinda busy , then lazy , then lost the office for a week, so here goes , lets do some fibreglassing
Ive started by using my top disk as a guide for cutting out the various layers of glass, rather than cutting them out whilst the resin in going off.
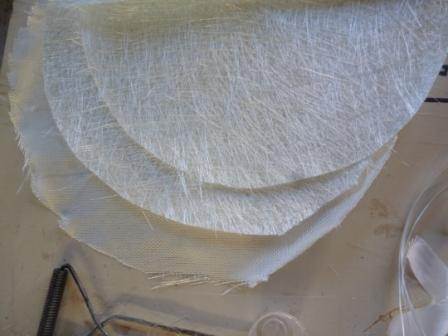
each side will have 2 discs of 250gm chopped strand and 1 layer of 8oz woven cloth. the small scraps left from the cutting out have been cut into smaller pieces to use in sections in the hub ,rim and ribs
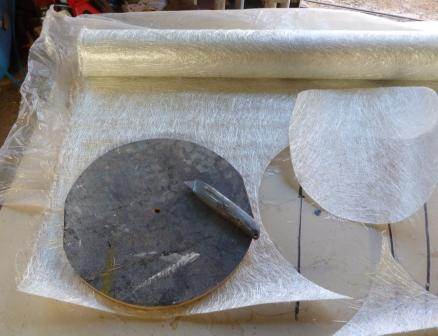

note the cutout for the centre. an alternative to the woven is to use a layer of glass tissue,and a third layer of chopped strand, instead of the woven cloth. the purpose of that first layer is to make sure that the chopped strand doesnt poke through the resin on the outer surface, it looks rough basically.
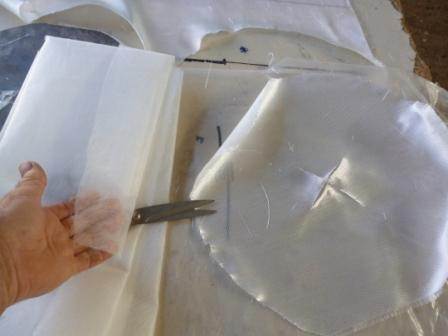
heres all the bits i will be using. notice some 50mm tape , you could use a strip of chopped strand, but im getting lazy,also some strips of tape for the bearing hub, instead of carbon.there is some pieces of straight roving that i will use in the build up of the hub, but very small pieces of cloth or chopped strand will be fine to mix with the cotton flock, you will also need some strips of chopped strand for the ribs.
I use 2 layers of 250gm .
note a 25 and 50mm brush and a 12mm ribbed roller. you will need a small roller like this to get a good bubble free layup
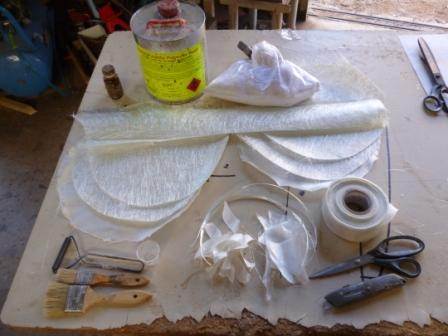
before I mix resin I stack all the layers for each side ready to put them in the mold. i doesnt seem important when making a little 16", but when its a big 26" its handy to just grab the next piece
Heres my improved rib mold. I can now whip up whatever size I need, 50, 75,100mm . apologies for jumping from metric to imperial, thats just how it is Im afraid


right, back to the mold.
wax on ,wax off, wax on , wax off. Ive used 2 coats of wax, smear some on let it dry, buff it OFF, then wax again then buff off again.
then wipe on a layer of PVA mold release. let it dry
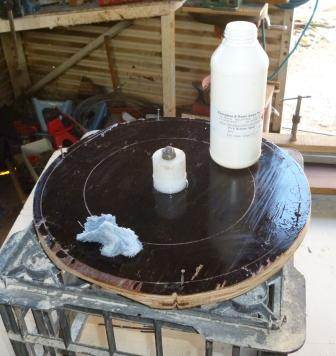

.
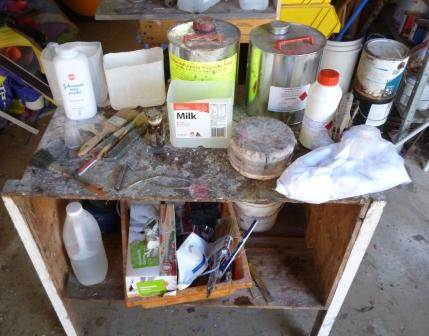
I have a little table that i put all the messy stuff on whilst working , its just an old box with legs added . on top i have a container with some talc in it for dusting hands, box of gloves underneath, extra catalyst, mixing sticks,rags for emergency mop up, spare measuring cup
scales, measuring cup current small container of catalyst, scales on top, acetone on the floor underneath

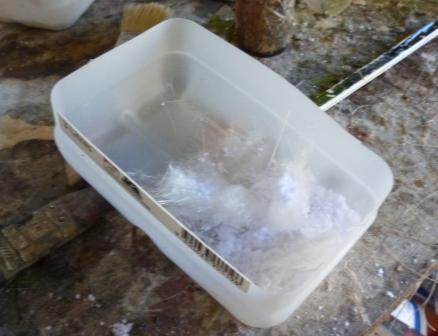
before I start mixing resin I prep the bog i will use for the bearing hub.
Its a small handful of chopped up glass, 2 tablespoons of cotton flock ( or cabosil) in a shallow container, ready to add resin


for thsi side of the wheel Im using 250gms of resin , so add 2.5mm catalyst(1%)
. Ive placed the layer of cloth dry onto the mold the poured on some resin, and brushed,and smoothed the cloth flat , using enough resin to get rid of the bubbles.
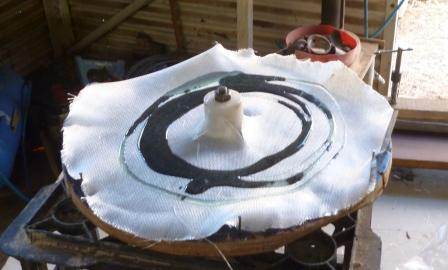


then I add the ring of cloth strips that will toughen up the bearing housing,
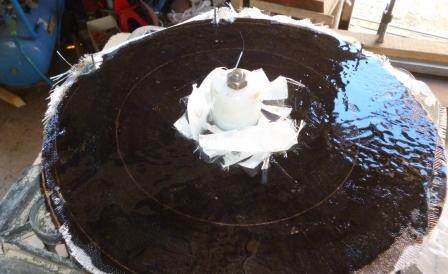
this is wetted in then lay down my layers of of chopped strand.
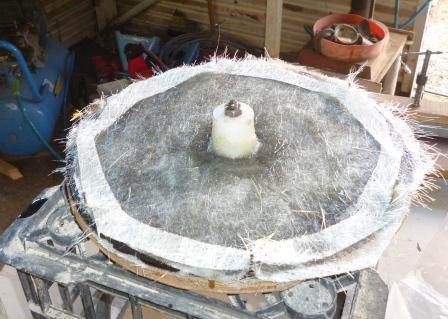
Ive also added a strip of glass on the edge , just to toughen it all up at the rim. this is where the little roller comes up trumps, add just enough resin to wet it out , without having resin pooling on the surface

landyacht
landyacht
WA
5921 posts
WA, 5921 posts
28 May 2012 10:21pm
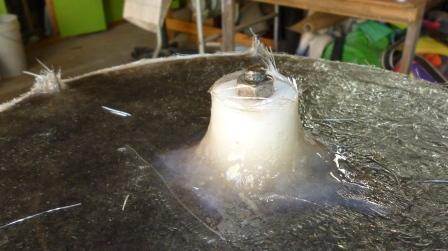
Now that the flat part of the disc is layed down , and still wet, Ive added about 50gms of the resin to the container of chopped glass ,cotton flock the resulting paste has been placed around the hub ready for the little pieces of cloth or chopped strand.

With the layers of cloth worked over the paste it looks happier and smoother . Ive built up the cloth layers nice and high, as this part will later slip over the aluminium hub spacer.

Now that the glassing of the rim is finished I have laid the rim into the mold to give a nice even surface for the later glueing .I havent clamped it, just enough pressure to hold it in place
important note!!!!!! before placing the rim into the mold THIS TIME, wipe some PVA onto the surface of the rim so it releases easily from the disc.
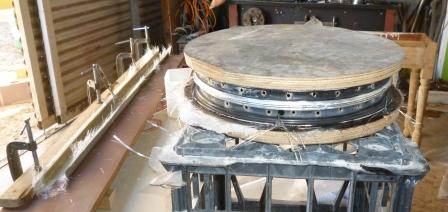
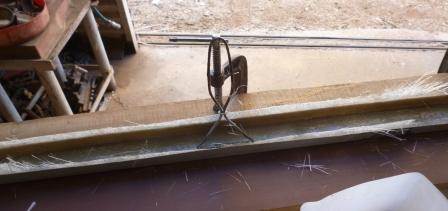
there should still be some resin left over from this mix, which is the used on the layup of the rib sections. on this occasion i ran out of resin and mixed another 100gms for the ribs. This wheel will be a 3 rib wheel , so there will be some section left over for the next wheel.
If you were planning to make a set up wheels, i would do a session of just making rib section. its important with the ribs to roll the glass in really well getting all the air out and having the glass well wetted.

With all the dirty work done its time for a beer, coffee, lunch , a game with the kids, maybe go sail a boat, canoe,or your windsurfer
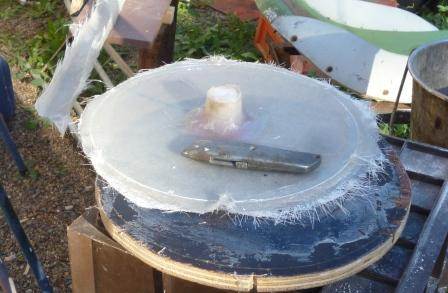
when you come back in a few hours it should have gone off enough to undo the centre bolt, and slide a thin knife blade under the glass to pop it off.
The nylon plug simply get tapped out with with a small hammer.
The next stage is the second disc and final assembly, but Im about to lose the computer for a few day then a long weekend with sailing , so dont expect a new post for a few days


landyacht
landyacht
WA
5921 posts
WA, 5921 posts
31 May 2012 8:14pm
sorry I havent posted for a few days , but Im having to actually work all day , in order to go sailing this weekend.
yesterday I was visited by AUS230 who commented on just how stiff the discs were compared to his epoxy ones, he was also suprised at just how solid and thick the bearing housings were.
I think Im finally tempting him to go all composite
he wandered off with 10 steel rims , so lordy knows what he will be up to next.
Im sooooo looking forward to seeing what the solid winged BERMINATOR can do on the weekend
Nikrum
Nikrum
TAS
1972 posts
TAS, 1972 posts
31 May 2012 11:27pm
Paul/aus230, Not interested in the Weekend unless there is some great footage.. Capiche! I'm sure I can find a severed Horses Head for you..
Ron
landyacht
landyacht
WA
5921 posts
WA, 5921 posts
10 Jun 2012 8:36pm
well no horse heads were delivered during the last 2 weeks so presumably it was caught by quarantine, and tracked back to the dill who sent the threat
sorry ive been busy with stuff, but back to the wheel.
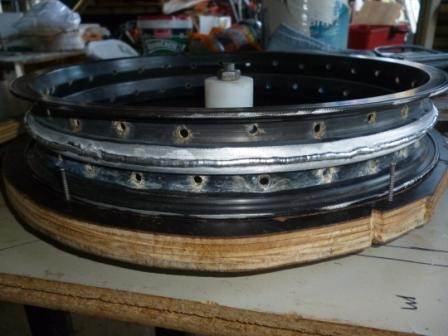
here is the mold all cleaned , waxed and PVA'd ready to do side 2 and complete the wheel. the little nails are back in thier holes, the rim has been dropped on to check on how central it is.
note that the rim has now been roughed up all over the surfaces to be glued or glassed have been roughed up with the sanding disk or even the wire wheel.
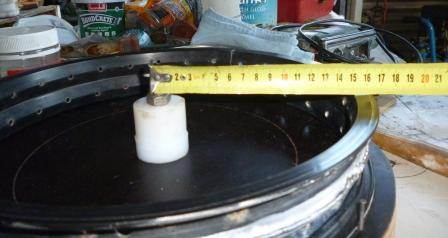
the other nylon plug that fits the aluminium spacer has been bolted in on a longer threaded rod, as the top plate will be bolted on. the length of the ally spacer is based on the rim width and bearing thickness
50mm+2x2.5mm(glass thickness)=55mm
minus 2x12mm( bearing thickness)=24mm
55-24=31mm
grooves have been cut in the ally by lathe or even a file /hacksaw

the previously made disc has been trimmed of excess glass and the surface where the ribs and rims are going to stick has been rough with the disc sander.
Ive also marked the outside of the disc where the spokes will sit.


remove the rim and simply repeat the steps to produce the first disc

Ive mixed 250gms of resin. when the disc has been layed up i then use 50mm of that resin to mix with cotton flock. and mix a batch that is pasty enough to still brush onto the rim. one face and half the inner rim is wetted with this mix


the rim is turned over and placed in the mold. then the edge is glassed into place .
MAKE SURE that the valve hole lines up in a space between 2 ribs. I had run out of mixed resin so a further 100gms was mixed, 50gms would have surficed, but its tricky to measure catalyst for such a small amount.Ive used some 50mm tape but chopped strand strips would be fine.
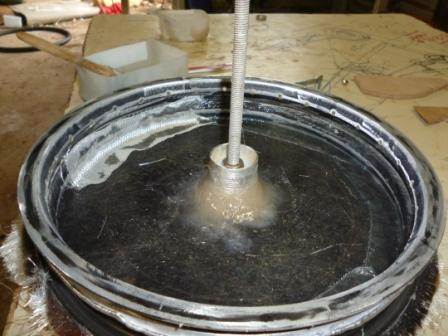
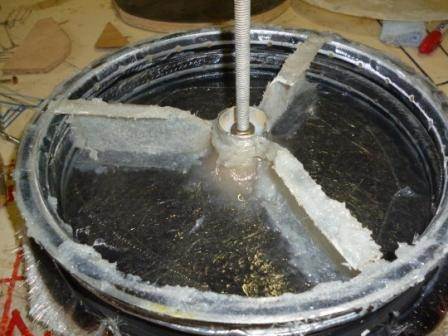
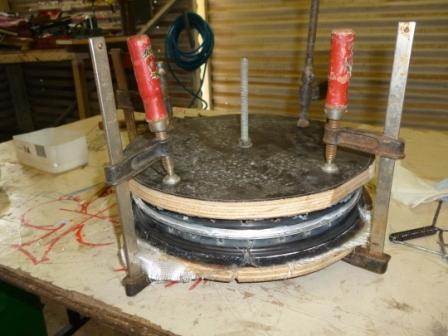
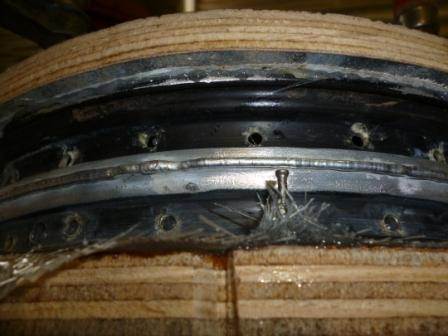
once this has been done its time to place the ribs. any smoothed surfaces have been trimmed and roughed by disc sanderand checked to make sure they fit.
Ive mixed a second batch of cotton flock paste , again thick but still brushable
all the surfaces to be glued are all covered,and any lumps in the rib and hub area smoothed over

then the first disc is placed on. remeber to place some flock on the ally spacerready to take the hub. you did remember to check the fit earlier of course

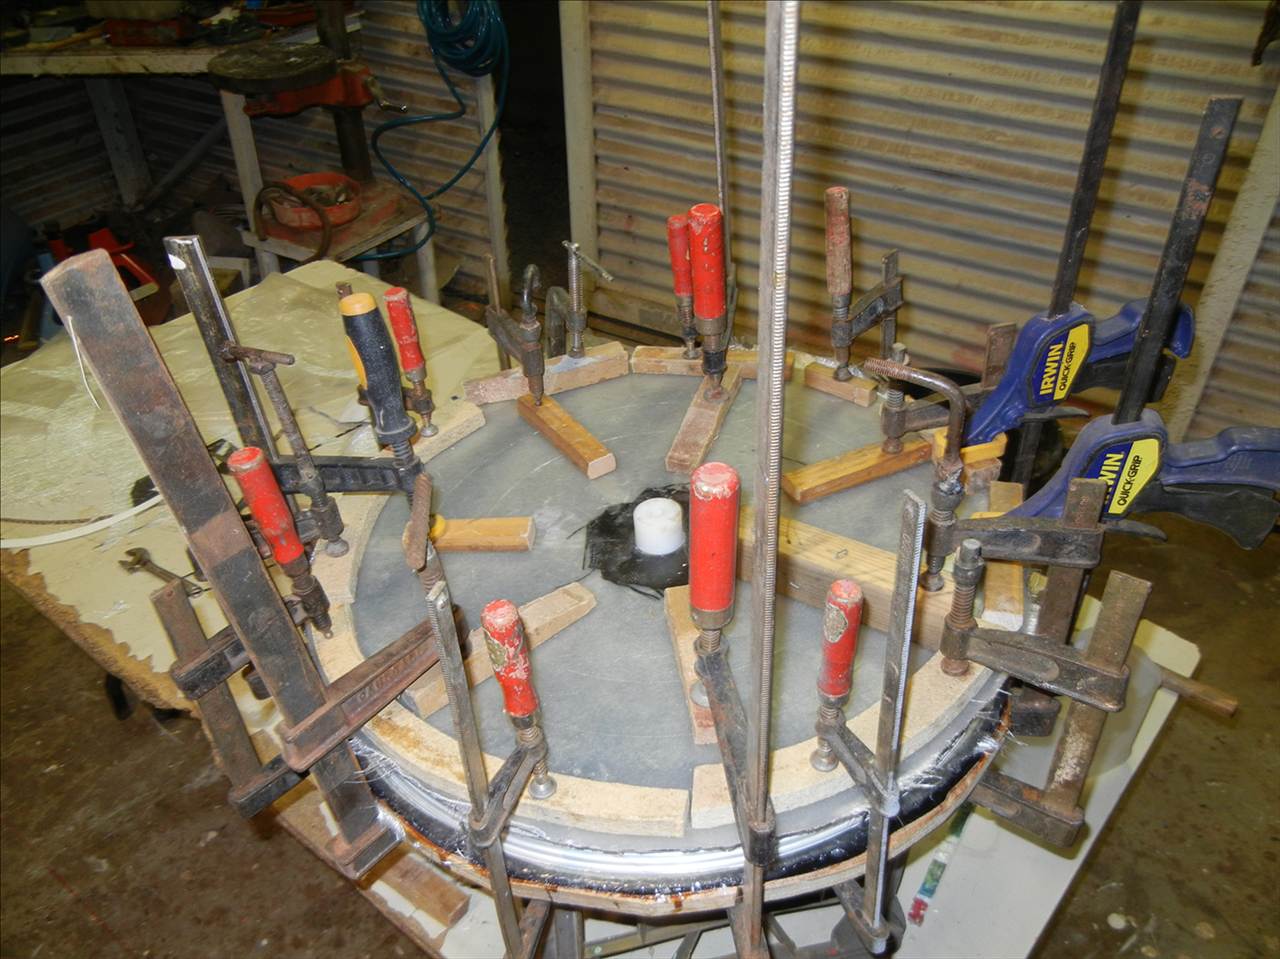
the wooden top is seated and bolted down with just a few clamps this time.
so much neater i think
Ive clamped it just enough to get a consistent squeezing out of flock, notice it doesnt slump or run as the consistencey is just nice


there was 50mm of resin left over so think about what little job you can have ready to use the resin .
in my case it is the hull of the next offcut sloopall 1250mm long to race the little schooner on a dam

after it all cures I will show how I cleanup an balance the rim ready to fit the tyre


landyacht
landyacht
WA
5921 posts
WA, 5921 posts
11 Jun 2012 9:36pm
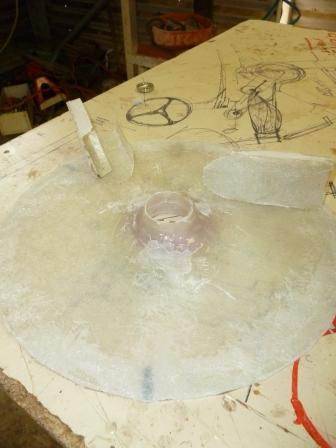
happy days!! wheel has been dropped out of the moldand all is well
I trimmed off the excess glass and finished with a sanding disc . I planned to show how to balance the rim but it didnt need it
basically i fit the bearings then sit the wheel on a horizontal shaft and let it settle. the bottom should be the heaviest point of the wheel. I then add small stripsof lead, made from lead flashing or wheel weights flattened out. I simply glue them using silicon sealer

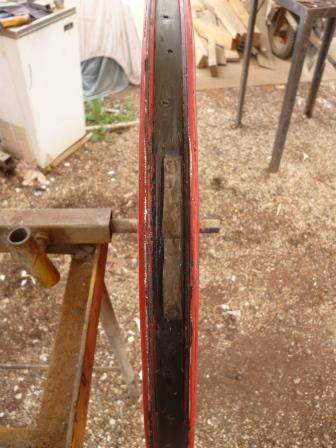
heres one from a few weeks ago , a skinny 26. this is alot more weight than usual. its usually cut into much smaller peices. overall weight for this rim was 1.1kg compared to the skinny 16 i made a few weeks ago that came in at 1.4kg

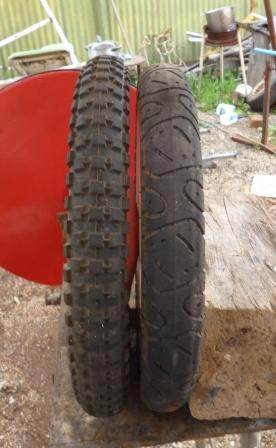
heres the completed wheel with a 16x1.95 hookworm fitted . the footprint achieved is 54mm wide and very stable under a side load but only inflated to 30psi the knobbly wheel is a shwinn 16x2.25 on a 32mm rim and manages a footprint of 52.. ,but needs 45psi to achive the same side load stability. this gives a really hard tyre that is rather uncomfortable and would have to affect the ride.
the technique Ive used here is exactly the same for bigger wheels , I would use 5 spokes for a 20" rim, and 7 spokes for a 26" rim
OK , now feel free to ask questions
thats questions , not bizzare comments in taswegian
Nikrum
Nikrum
TAS
1972 posts
TAS, 1972 posts
12 Jun 2012 9:43am
Redirect my Question to General- Capiche-Landyacht
Ron
aus230
aus230
WA
1660 posts
WA, 1660 posts
12 Jun 2012 9:37am
New FISLY rule for class5 wheels

“Class 5 specifications
: Max. diameter of the wheels


Including the tyre, the diameter of the wheel must not exceed 750mm.

The wheel alone shall not exceed 26”.

The wheel width shall not exceed 100mm measured to the outside dimension
of the wheel rim.
lachlan3556
lachlan3556
VIC
1066 posts
VIC, 1066 posts
18 Jun 2012 9:41pm
Great work!
Please Register, or first...
Topics Subscribe Reply

Return To Classic site 😭
Or... let us know if a problem, so we can tweak! 😅